Installing or Replacing an Electric Water Heater
Installing or Upgrading an Electric Water Heater
A Quick Look at the Procedures for Installing or Upgrading an Electric Water Heater
- The first step is to turn off the water supply and the circuit breaker.
- Second step: Empty the contents of the water heater.
- Step 3: Remove the cover from the front of the device.
- Installing the heater in the water tank is the fourth step.
- Step 5: Attach pipes.
- Installation of flow and pressure valves is the sixth step.
- Step 7: Bleed hot water system
- Step 8: Conduct a thorough examination of the electrical components.
- Turning on the circuit breaker is Step 9. Step 10 involves checking the temperature as well as the outlets.
A number of the problems that might occur with water heaters can be fixed. On the other hand, if your existing water heater is particularly old or out of date, it is possible that you may consider replacing it with a more modern model. The average lifespan of a water heater is only ten years, despite the fact that some models have been known to live as long as twenty. Before beginning this process, it is essential that you have a thorough understanding of what you will be getting into if you intend to perform the installation of a tankless electric water heater on your own.
Regardless of the type of do-it-yourself job you intend to finish, planning is one of the most important factors that will determine how successful you are. If you go into a job without the appropriate tools or an understanding of what work needs to be done, it is likely that you will run into problems that could cost you both time and money. If you go into a job with the appropriate tools and an understanding of what work needs to be done, it is likely that you will run into problems.
This tankless electric water heater installation guide has been written out for you in a step-by-step format to help you get started.
Installing a Electric Water Heater Requires You to Turn Off the Circuit Breaker, As Well As the Water Supply.
It is crucial that you turn off the circuit breaker before you begin the project. This will ensure that the electric cables will not be powered on while you are working on them.
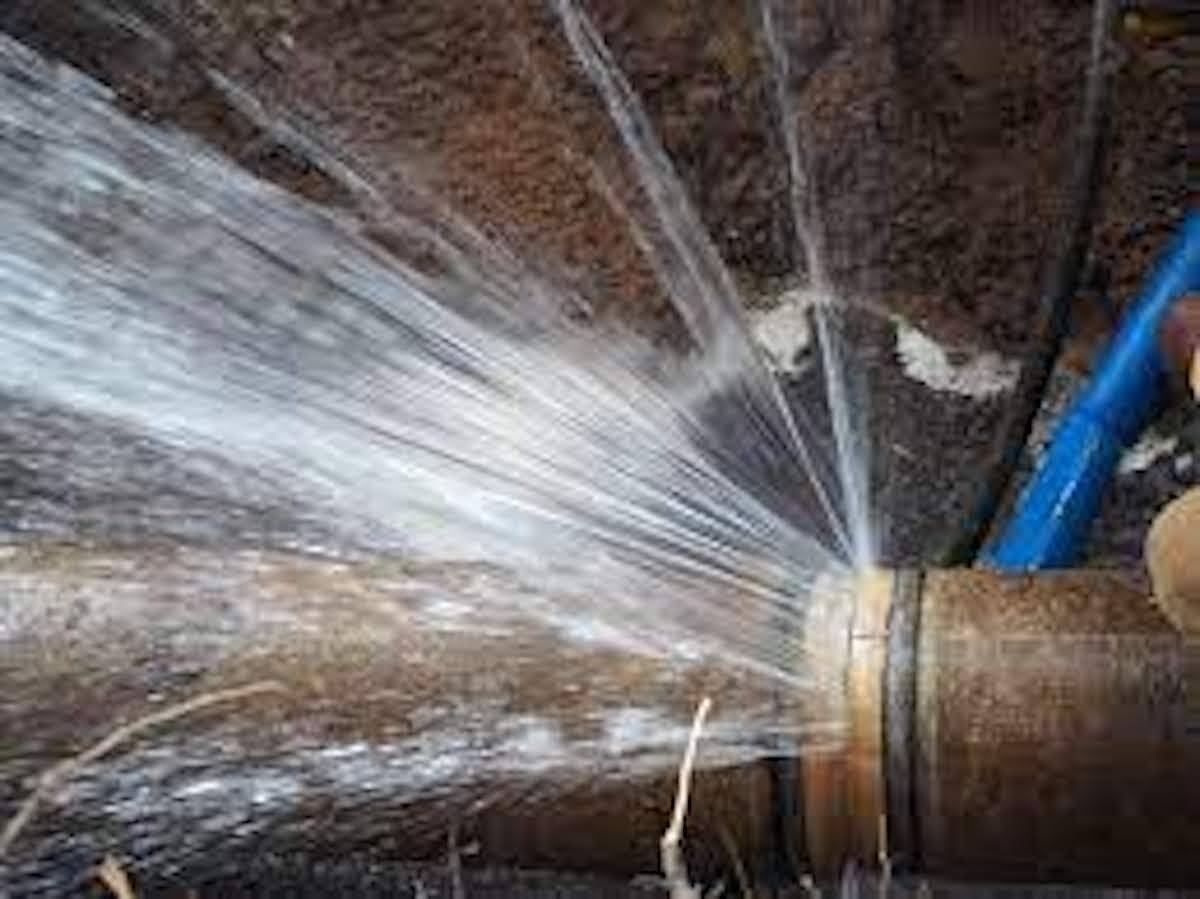
At this time, you should also switch off the water supply, unless you want parts of your home to be flooded when you attempt to replace your existing water heater with a new one. In that case, continue with the replacement process without turning off the water supply. Bear in mind that flooding can cause damage that amounts to thousands of dollars; this is the reason why the first step on this list is the most crucial one to take.
When disconnecting your old heater, make sure it is emptied of its fuel.
When removing a water heater of the tank type from your home, you will want to be sure that it has been drained of all of its contents first. In order to accomplish this task, you will need a hose and some sort of container, such as a bucket. Check out our guide for a more in-depth look at how to drain a water heater if you need any additional guidance.
Before you can get rid of the outdated wiring and wall-mounting brackets, the connecting pipes will need to have their screws undone. Throughout this operation, you need to take extra precautions to protect the older plumbing and electrical. In such case, they will have to be fully replaced, which will simply add more time and money to the job.
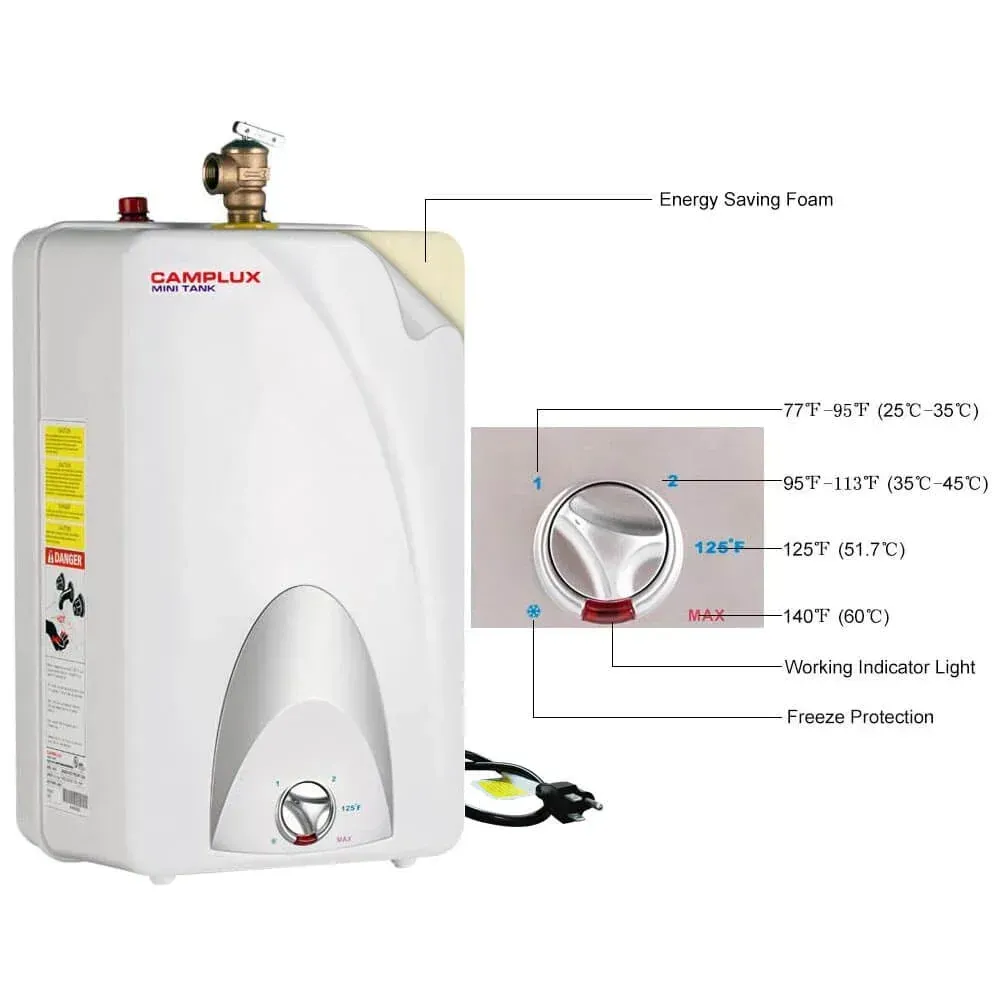
Remove the cover from the front of the book
Remove the front cover of the new tankless unit using a screwdriver in a careful manner before proceeding with the installation. When you have finished removing all of the screws, put them in a location where it will be difficult for you to misplace them. It is vital to use each and every one of these screws if you want your water heater to work well. It is important to keep in mind that the cover and the device may already have some cords connected to one another. Before you remove the cover completely, make sure that these are unplugged first.
Install the Water Heater in its Location.
After that, it will be necessary to mount the unit to the wall in some fashion. Check to see that the location of your water heater is not one of the areas in your home that is prone to clutter or disorganization. Having said that, it is essential that, in the event of a crisis, you have quick and uncomplicated access to the storage unit. The mounting of the water heater is a straightforward process that just requires a few screws and the mount that was provided in the package. Make sure you are following the instructions that were provided with your item.
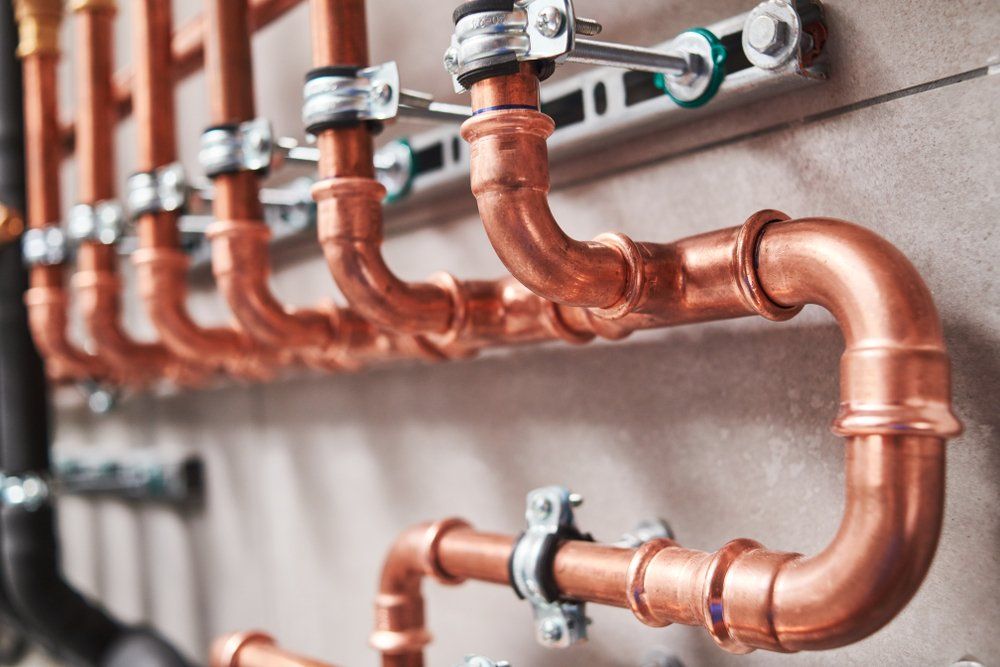
Connect Any Pipes
After you have completed the process of mounting the device, you will need to connect the pipes that carry hot water to each room in your house. These connections will enter and exit your water heater at the appropriate times. They ought to be situated in the lower parts of the apparatus. You should consult the installation diagram, which you should have gotten with your unit and which you should have received with your unit in order to establish where the connections should go.
Stainless steel is the material that should be used for the piping in a tankless water heater because it is the most durable. It is able to resist high temperatures without compromising the system's accessibility or its level of flexibility. Copper and polyvinyl chloride (PVC) piping are two suitable substitutes to use in place of stainless steel piping in the event that you do not have access to stainless steel piping. If you choose for a flexible pipe made of stainless steel, you can be sure that the connections can be detached easily, which is beneficial if you want to clean them on a regular basis. This is because stainless steel doesn't rust as easily as other metals. Regular cleanings are encouraged by the majority of instruction manuals.
Set up the flow and pressure valves.
After the connections have been made, it is time to install the flow and pressure valves in the system. The installation of flow valves is a rather straightforward process. They give you the option, in the event that repairs are required, to turn off only the water supply to the heater, rather than having to turn off the water supply to your entire house.
Pressure valves only need to be put in a system if the local plumbing authority mandates their presence. Along the side of the electric water heater designated for "hot water" is where the pressure release valve needs to be put. In order to get the highest possible level of protection, you might additionally put one on the other side of the heater.
Make that the system for the hot water is bleeding correctly.
At this point in the process of installing a new appliance, the water heater has to have all of its connections made and should be completely installed. In spite of this, you will still need to complete the bleeding procedure before you turn on the hot water system. It is important to ensure that each and every hot water outlet in your home is open, as this will assist in the removal of any air that may be present in the system. The bleeding process should be finished after a few minutes have passed during which these openings should be kept open.
Before attaching the cover, make sure that the electrical connections have been inspected.
It is imperative that you invest the time and effort necessary to verify the electrical connections to your water heater in order to protect not just yourself but also any other members of your household who may be present. Check to see that these connections have been wired properly and that they have been positioned at the appropriate terminals. After that, you need to reconnect the lid using each of the screws that were present at the beginning. After the cover has been securely attached to the device in a methodical manner, the procedure of installation is very close to being finished.
Put the breaker for the circuit in the "On" position.
Because you are no longer required to perform any maintenance or repairs on the heater itself, you may now turn on the circuit breaker without risk.
Confirm the temperature, then put the outlets through their paces.
After you have powered up the water heater, the next step is to adjust the temperature settings for the system. It is suggested that you do not use these devices in order to prevent the risk of receiving burns because they are capable of reaching very high temperatures when set to their maximum settings. At this time, you should also check each and every hot water outlet in your home, including the faucets, showers, dishwashers, and washing machines, to ensure that the temperature is accurate and that the water heats up rapidly. If the water's temperature is unacceptably high, you should probably adjust the temperature settings so that they are lower.

You might also like